Linux压缩和解压缩
一、生成测试文件(dd命令)
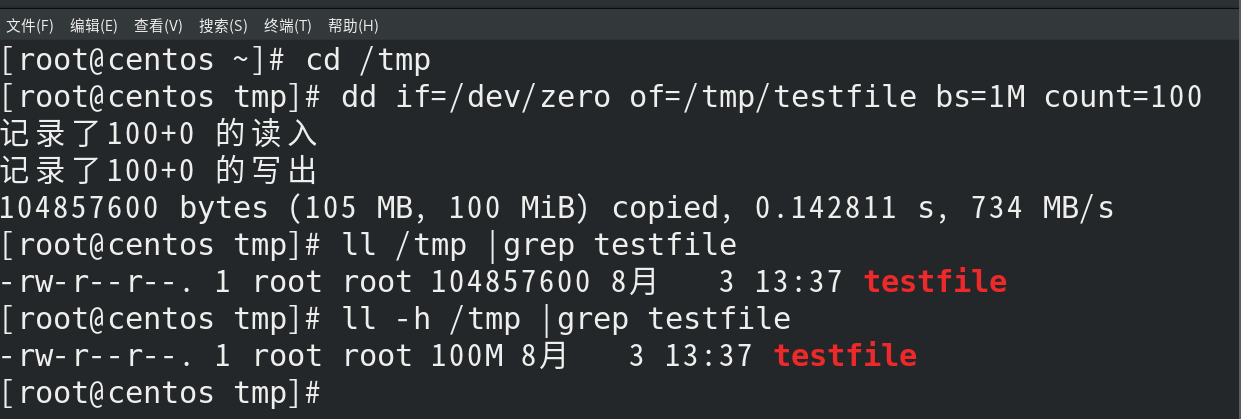
1.生成一个大小为100M的全是二进制的0的文件
[root@xnha ~]# cd /tmp
[root@xnha tmp]# dd if=/dev/zero of=/tmp/testfile bs=1M count=100
记录了100+0 的读入
记录了100+0 的写出
104857600 bytes (105 MB, 100 MiB) copied, 0.0855957 s, 1.2 GB/s
[root@xnha tmp]# ll /tmp |grep testfile
-rw-r--r--. 1 root root 104857600 3月 9 10:29 testfile
[root@xnha tmp]# ll -h /tmp |grep testfile
-rw-r--r--. 1 root root 100M 3月 9 10:29 testfile
• if=/dev/zero
• of=/tmp/testfile
• bs=1M
• count=100
|
| 设备文件 |
输出内容 |
典型用途 |
| /dev/zero |
无限连续的0x00字节 |
创建空白文件,初始化存储空间 |
| /dev/null |
黑洞设备(丢弃所有写入) |
屏蔽程序输出 |
**/dev/null **
- 写入:任何写入 /dev/null 的数据都会被系统丢弃,不占用磁盘空间。
- 读取:从 /dev/null 读取数据会立即返回空(EOF,文件结束标志),不会产生任何实际数据。
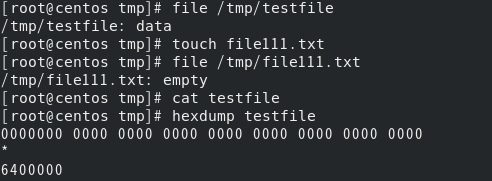
2. 查看文件
[root@xnha ~]# file /tmp/testfile
/tmp/testfile: data
[root@xnha ~]# file /tmp/file111.txt
/tmp/file111.txt: ASCII text
[root@xnha tmp]# cat testfile
[root@xnha tmp]# hexdump testfile
0000000 0000 0000 0000 0000 0000 0000 0000 0000
*
6400000
[root@xnha tmp]#
|
二、压缩命令 gzip
命令格式:
gzip [选项] 文件名
gunzip [选项] 文件名.gz
|
选项解读:
| 参数 |
说明 |
-d |
解压文件 ( gunzip 的等价操作) |
-k |
保留原始文件(压缩/解压后不删除) |
-1--9 |
压缩级别: 1 最快压缩率最低, -9 最慢压缩率最高(默认 -6 ) |
-v |
显示压缩率等详细信息 |
-c |
输出到标准输出(不修改文件) |
-t |
测试压缩文件完整性 |
-r |
递归处理目录(需结合 tar 使用) |
-l |
查看压缩文件信息(压缩前后大小、压缩率) |
使用方法:
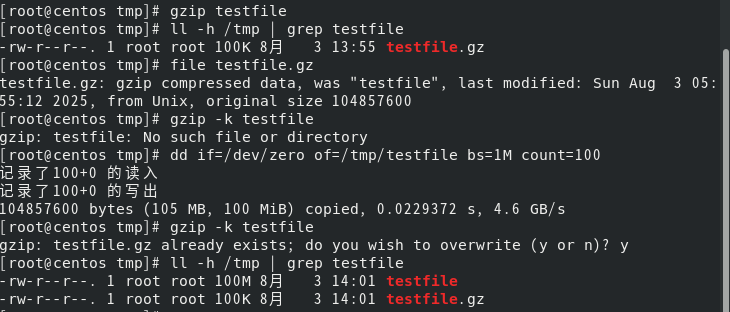
1.基础压缩
[root@xnha tmp]# gzip testfile
[root@xnha tmp]# ll -h /tmp | grep testfile
-rw-r--r--. 1 root root 100K 3月 9 10:29 testfile.gz
[root@xnha tmp]# file testfile.gz
testfile.gz: gzip compressed data, was "testfile", last modified: Sun Mar 9 14:29:48 2025, from Unix, original size 104857600
[root@xnha tmp]# gzip -k testfile
[root@xnha tmp]# ll -h /tmp | grep testfile
-rw-r--r--. 1 root root 100M 3月 9 10:29 testfile
-rw-r--r--. 1 root root 100K 3月 9 10:29 testfile.gz
|
2.解压操作
[root@xnha tmp]# gunzip testfile.gz
[root@xnha tmp]# ll -h /tmp | grep testfile
-rw-r--r--. 1 root root 100M 3月 9 10:29 testfile
[root@xnha tmp]# gzip -d -k testfile.gz
gzip: testfile already exists; do you wish to overwrite (y or n)? y
|

3.查看压缩内容
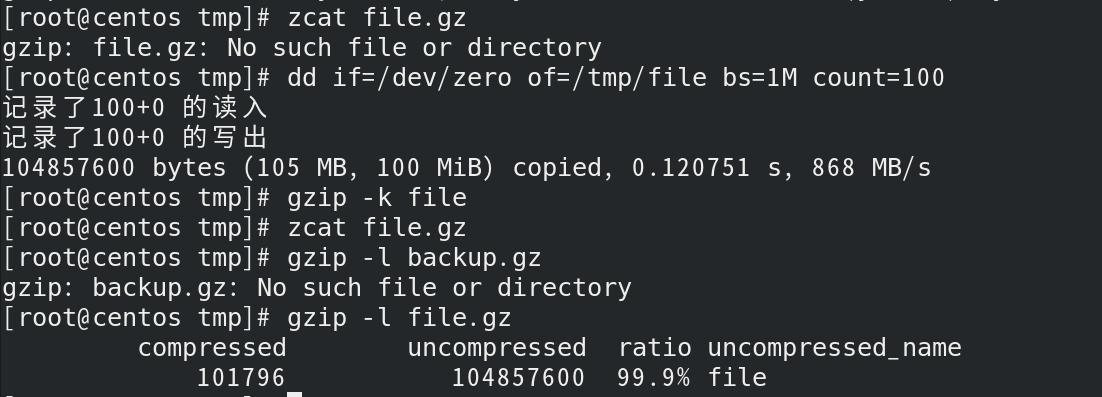
zcat file.gz
gzip -l backup.gz
compressed uncompressed ratio uncompressed_name
736513 2473400 70.3% backup
|
三、压缩命令bzip2
bzip2 是 Linux 中基于 Burrows-Wheeler 变换 的高效压缩工具,相比 gzip 压缩率更高,但速度较
慢。压缩后生成 .bz2 后缀文件,默认删除原始文件。
命令格式:
bzip2 [选项] 文件名
bunzip2 [选项] 文件名.bz2
|
参数解读:
| 参数 |
说明 |
-d |
解压文件(同 bunzip2 ) |
-k |
保留原始文件(压缩/解压后不删除) |
-1--9 |
压缩级别: -1 最快压缩率最低, -9 最慢压缩率最高(默认 -9 ) |
-v |
显示压缩进度和详细信息 |
-c |
输出到标准输出(不修改文件) |
-t |
测试压缩文件完整性 |
-f |
强制覆盖已存在的输出文件 |
-s |
降低内存占用(牺牲速度) |
-z |
显式指定压缩模式(默认行为) |
使用方法:
1.基础压缩
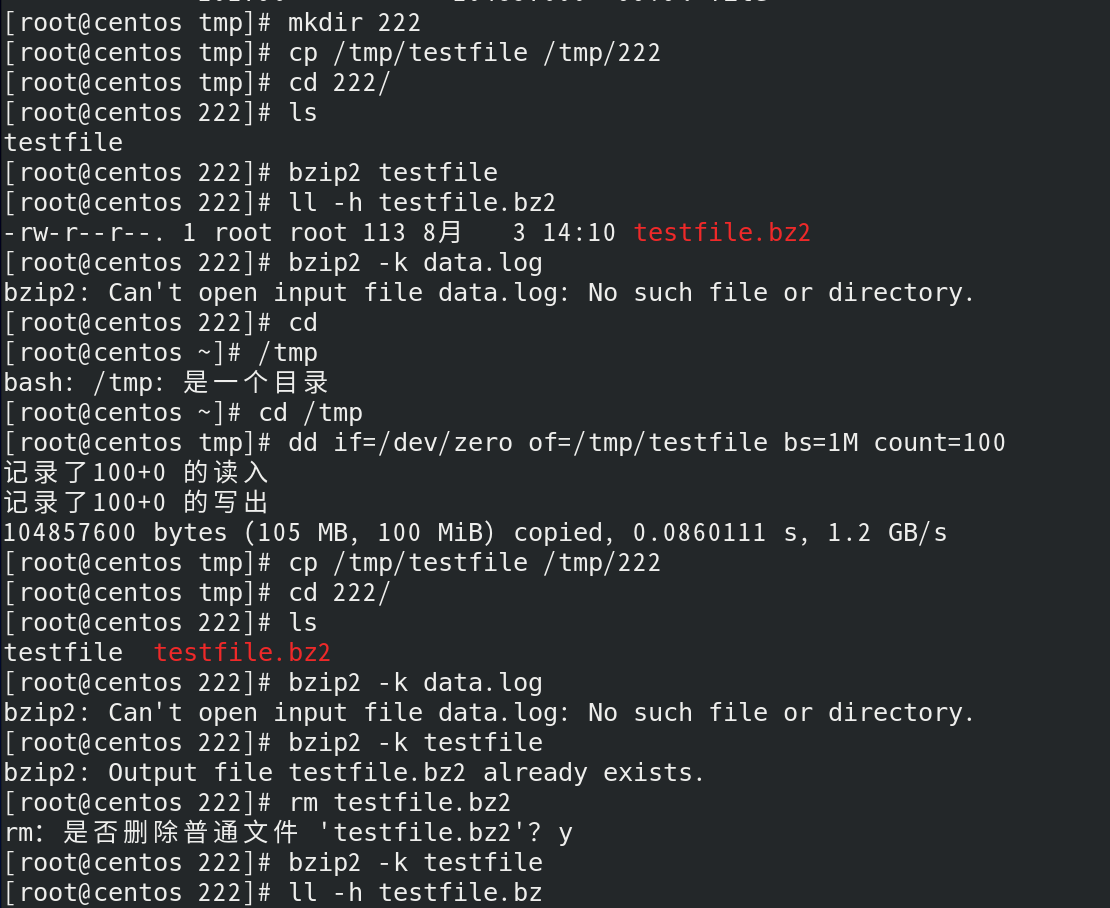
[root@xnha tmp]# mkdir 222
[root@xnha tmp]# cp /tmp/testfile /tmp/222
[root@xnha tmp]# cd 222/
[root@xnha 222]# ls
testfile
[root@xnha 222]# bzip2 testfile
testfile.bz2,删除原文件
[root@xnha 222]# ll -h testfile.bz2
-rw-r--r--. 1 root root 113 3月 9 11:00 testfile.bz2
bzip2 -k data.log
|
2.解压操作
[root@xnha 222]# bunzip2 testfile.bz2
[root@xnha 222]# ls testfile
[root@xnha 222]# bzip2 -dk testfile.bz2
[root@xnha 222]# ls
testfile testfile.bz2
|

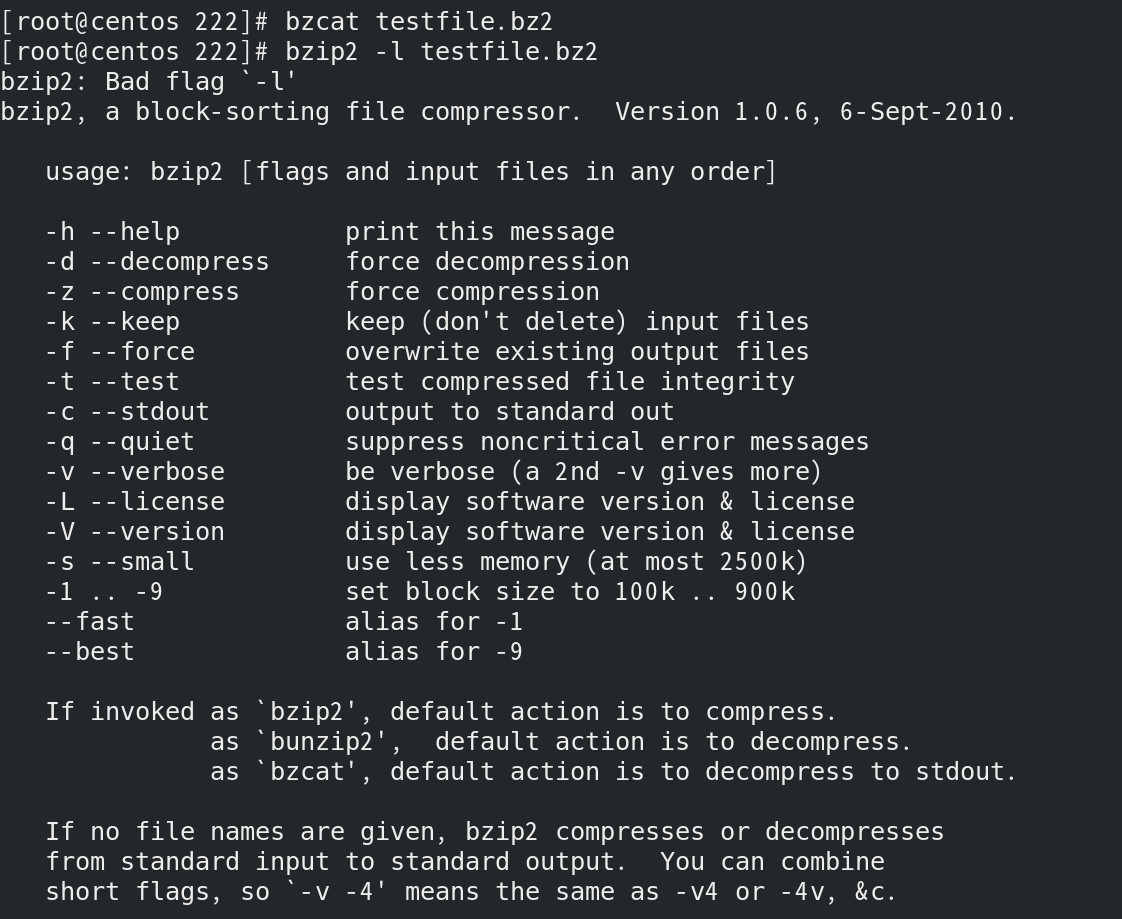
3.查看压缩内容
bzcat file.bz2
bzip2 -l archive.bz2
Compression ratio: 4.20:1
compressed size: 102400 bytes
uncompressed size: 430080 bytes
|
四、打包命令tar
实验目标
建立两个大小为10M 和 20M的文件 分别命名为big1和big2将其放入/tmp/test123 文件夹中。尝试对文
件夹进行压缩
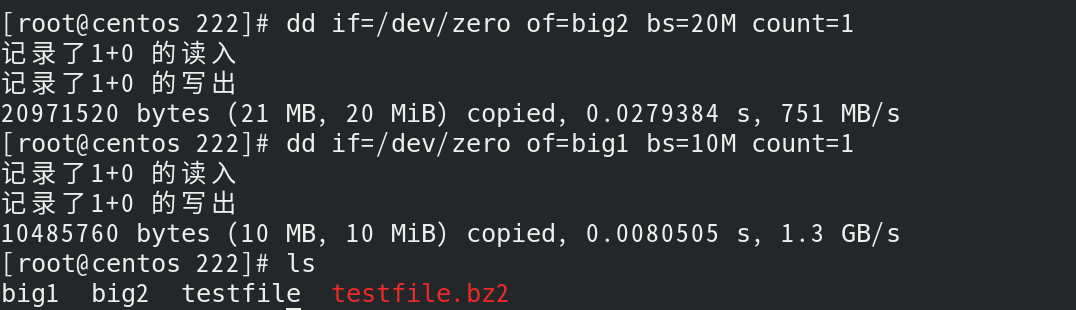
1.创建两个文件
[root@xnha 222]# dd if=/dev/zero of=big2 bs=20M count=1
记录了1+0 的读入
记录了1+0 的写出
20971520 bytes (21 MB, 20 MiB) copied, 0.0111189 s, 1.9 GB/s
[root@xnha 222]# dd if=/dev/zero of=big1 bs=10M count=1
记录了1+0 的读入
记录了1+0 的写出
10485760 bytes (10 MB, 10 MiB) copied, 0.00505431 s, 2.1 GB/s
[root@xnha 222]# ls
big1 big2
|
2.创建目录,移动文件
[root@xnha 222]# cd /tmp
[root@xnha tmp]# mkdir test123
[root@xnha test123]# mv /tmp/222/big[12] /tmp/test123/
[root@xnha test123]# ls
big1 big2
|


3.尝试使用gzip和bzip2对test123文件夹进行压缩(报错)
[root@xnha tmp]# gzip test123
gzip: test123 is a directory -- ignored
[root@xnha tmp]# bzip2 test123
bzip2: Input file test123 is a directory.
|

tar命令功能
tar (Tape Archive)是 Linux 系统中用于 打包文件/目录 的归档工具,支持保留文件权限、时间戳和
目录结构(不对文件/目录本身造成任何影响,产生新文件)。常与压缩工具( gzip 、bzip2 、xz )
结合使用,形成 .tar.gz 、.tar.bz2 、.tar.xz 等压缩包
基础语法:
参数说明:
主选项模式(必选其一)
| 参数 |
说明 |
-c |
创建新归档文件(Create) |
-x |
解压归档文件(eXtract) |
-t |
查看归档内容列表(List) |
-r |
追加文件到已有归档(需先解压再重新打包) |
常用辅选项
| 参数 |
说明 |
-f |
指定归档后的文件位置(必须放在最后) |
-v |
显示操作详情(Verbose) |
-z |
使用 gzip 压缩(生成 .tar.gz ) |
-j |
使用 bzip2 压缩(生成 .tar.bz2 ) |
-J |
使用 xz 压缩(生成 .tar.xz ) |
-C |
解压到指定目录(Change directory) |
| –exclude |
排除指定文件/目录 |
| –wildcards |
使用通配符匹配文件 |
典型使用场景
1.打包与压缩
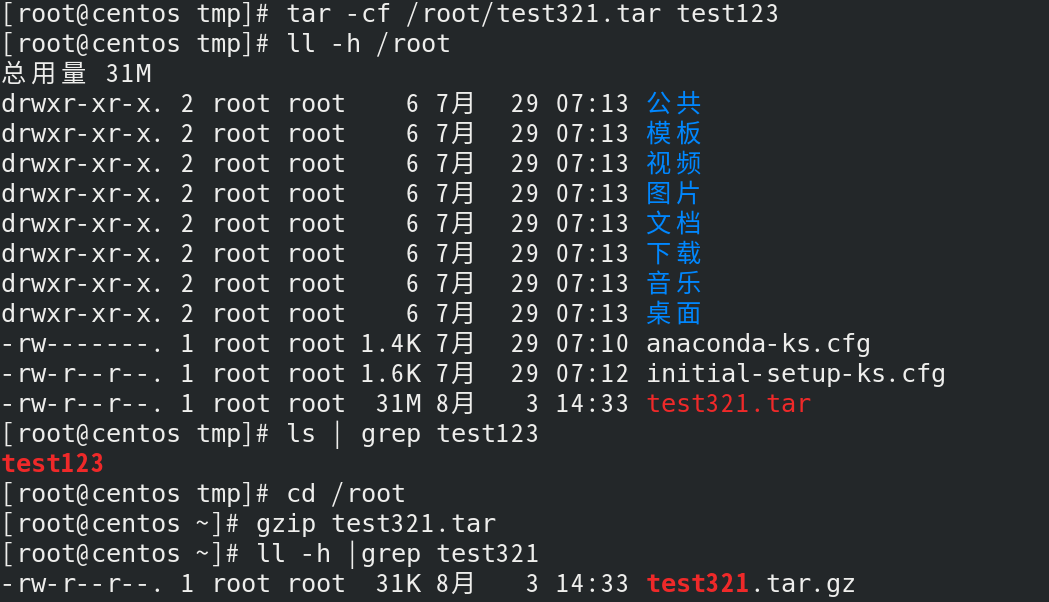
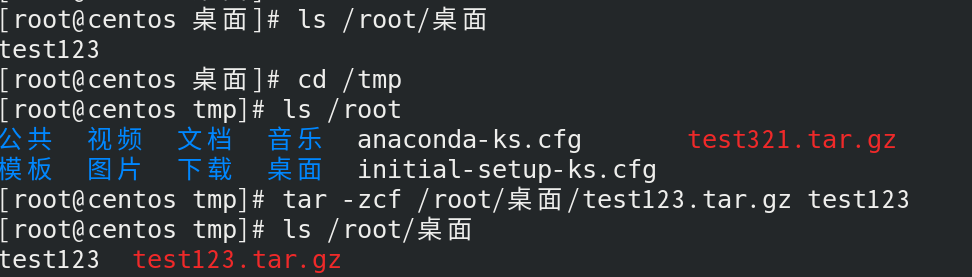
[root@xnha tmp]# tar -cf /root/test321.tar test123
文件名(必须放最后,后面跟文件名) 只能是-cf
[root@xnha tmp]# ll -h /root
总用量 31M
drwxr-xr-x. 2 root root 6 3月 3 21:51 公共
drwxr-xr-x. 2 root root 6 3月 3 21:51 模板
drwxr-xr-x. 2 root root 6 3月 3 21:51 视频
drwxr-xr-x. 2 root root 6 3月 3 21:51 图片
drwxr-xr-x. 2 root root 6 3月 3 21:51 文档
drwxr-xr-x. 2 root root 6 3月 3 21:51 下载
drwxr-xr-x. 2 root root 6 3月 3 21:51 音乐
drwxr-xr-x. 2 root root 6 3月 4 01:57 桌面
-rw-------. 1 root root 1.5K 3月 3 21:50 anaconda-ks.cfg
-rw-r--r--. 1 root root 4 3月 9 10:38 file111.txt
-rw-r--r--. 1 alice root 16 3月 7 00:03 file1.txt
-rw-r--r--. 1 root root 14 3月 7 00:02 file.txt
-rw-r--r--. 1 root root 1.7K 3月 3 21:50 initial-setup-ks.cfg
-rw-r--r--. 1 root root 31M 3月 9 11:24 test321.tar
[root@xnha tmp]# ls | grep test123
test123
[root@xnha tmp]# cd /root
[root@xnha ~]# gzip test321.tar
[root@xnha ~]# ll -h |grep test321
-rw-r--r--. 1 root root 31K 3月 9 11:24 test321.tar.gz
[root@xnha tmp]# ls /root/桌面
test123
[root@xnha tmp]# ls /root
公共 图片 音乐 file111.txt initial-setup-ks.cfg
模板 文档 桌面 file1.txt test123
视频 下载 anaconda-ks.cfg file.txt test321.tar
[root@xnha tmp]# tar -zcf /root/桌面/test123.tar.gz test123
[root@xnha tmp]# ls /root/桌面
test123 test123.tar.gz
tar -cjvf data.tar.bz2 /var/log/
tar -cJvf archive.tar.xz /opt/app/
|
2.解压操作
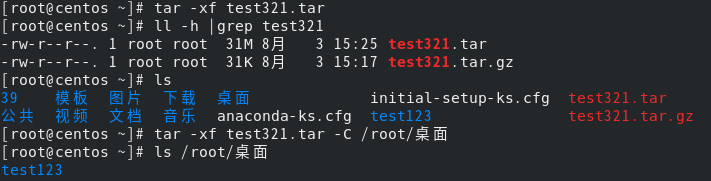
[root@xnha ~]# tar -xf test321.tar
[root@xnha ~]# ll -h |grep test321
-rw-r--r--. 1 root root 31M 3月 9 11:24 test321.tar
[root@xnha ~]# ls
公共 图片 音乐 file111.txt initial-setup-ks.cfg
模板 文档 桌面 file1.txt test123
视频 下载 anaconda-ks.cfg file.txt test321.tar
[root@xnha ~]# tar -xf test321.tar -C /root/桌面
[root@xnha ~]# ls /root/桌面
test123
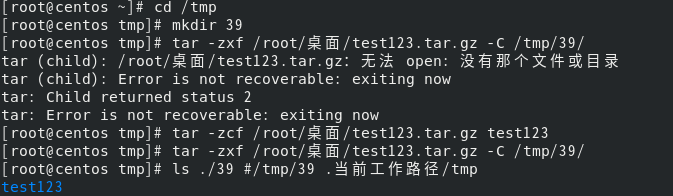
[root@xnha tmp]# mkdir 39
[root@xnha tmp]# tar -zxf /root/桌面/test123.tar.gz -C /tmp/39/
[root@xnha tmp]# ls ./39
test123
tar -xjvf data.tar.bz2
|
3.查看归档内容
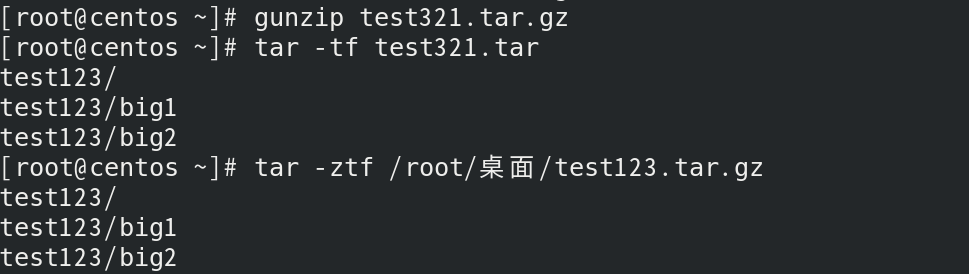
[root@xnha ~]# gunzip test321.tar.gz
[root@xnha ~]# tar -tf test321.tar
test123/
test123/big1
test123/big2
[root@xnha tmp]# tar -ztf /root/桌面/test123.tar.gz
test123/
test123/big1
test123/big2
tar -tzvf data.tar.bz2 | grep "error.log"
|
4.高级用法
tar -czvf site.tar.gz --exclude="*.tmp" --exclude="cache/" /var/www/
tar -czvf logs.tar.gz /var/log/*.log
tar -czvf incremental_backup.tar.gz --newer-mtime="2023-01-01" /data/
|